FAQs & Support
The Anatomy Of A Successful Impression
The Anatomy Of A Successful Impression
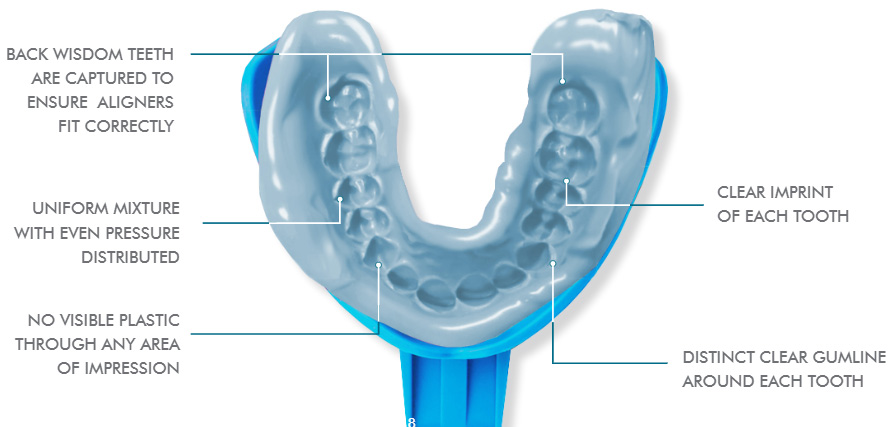
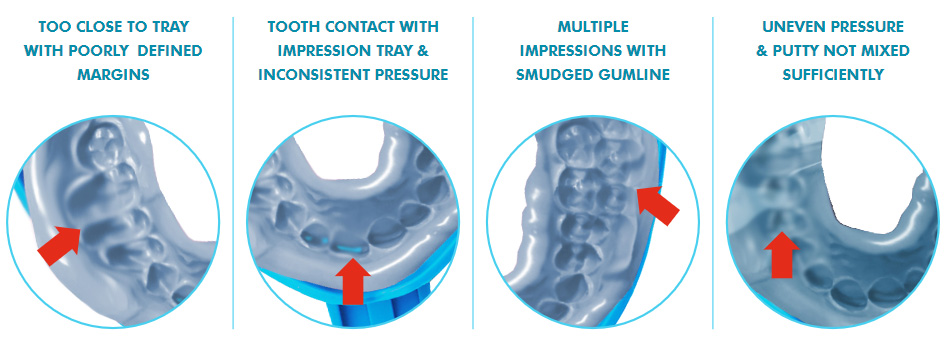
Inspect your impressions carefully. Remember at least half of your back molar must be captured in order for the aligners to fit correctly. Below are examples of rejected impressions due to common mistakes.
One blue and one white per tray
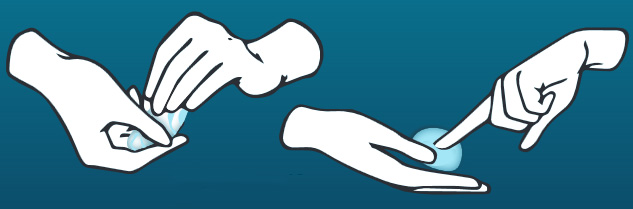
Remove the putty, one blue and one white container per impression.

Within 30 seconds mix the putty together into one uniform color. Get rough with your putty and knead vigorously until thoroughly mixed. Make sure there are no swirls or streaks. You must mix quickly before the impression material starts to harden.
 30 SECONDS
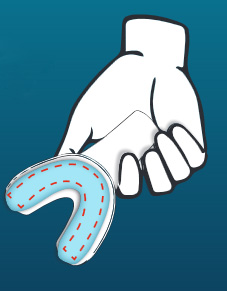
 Roll the blended putty with both hands into a uniform 4-inch log as shown below.
 10 SECONDS
 Carefully place the rolled putty into the impression tray making sure it fills the entire ‘U-shape’ all the way to the back. Do not force or smash it into place.
Fill all the way to the back of the entire ‘U-shape’ for best results. Proceed immediatley to Step 5 without delay.
 5 SECONDS
 Open and relax your mouth. Place the tray with the impression putty in your mouth, remember there is no need to remove your gloves.
Use your fingers and thumbs to press the tray in place up to your gums. Pull your lip over the tray and leave it in place for 3 minutes. Do not shift or wiggle the tray as this will cause inconsistencies in your impression.
All your teeth should be fully enveloped by the putty to capture the gumline. Avoid biting into the impression putty as this may cause contact with the tray. Use your thumbs to gently hold the tray in place and ensure that it does not move while you make your impression.
Carefully remove your impression tray by the handle after the timer goes off. You will need to repeat this step until you have all 4 impressions, 2 for your upper row and 2 for your lower row of teeth.